Let’s see how to install OKD on a CentOS virtual machine !
What is OKD?
OKD is a distribution of Kubernetes optimized for continuous application development and multi-tenant deployment. OKD adds developer and operations-centric tools on top of Kubernetes to enable rapid application development, easy deployment and scaling, and long-term lifecycle maintenance for small and large teams. OKD is the upstream Kubernetes distribution embedded in Red Hat OpenShift.
Installing OKD on CentOS
Prerequisites
Swap should be disabled.
Creating the docker user
#!/bin/bash

function prerequisites(){
	if [ "$(id -u)" != "0" ]; then
		echo "This script must be run as root"
		exit 1
	fi

	[[ -z ${DOCKER_USER} ]] && { echo "DOCKER_USER is not set or empty"; exit 1; }
	[[ -z ${DOCKER_PASSWORD} ]] && { echo "DOCKER_PASSWORD is not set or empty"; exit 1; }
}

function create_user(){

	id -u ${DOCKER_USER} 2>&1 1>/dev/null

	if [ $? -ne 0 ] ; then
		# Adding docker user
		useradd ${DOCKER_USER}
		echo ${DOCKER_PASSWORD} | passwd --stdin ${DOCKER_USER}
	else
		echo "The user ${DOCKER_USER} already exist"
	fi
}

prerequisites
create_user
Updating CentOS virtual machine and install Docker
#!/bin/bash

function prerequisites(){
	if [ "$(id -u)" != "0" ]; then
		echo "This script must be run as root"
		exit 1
	fi

	[[ -z ${YUM_UPDATE} ]] && { echo "YUM_UPDATE is not set or empty"; exit 1; }
}

function install_docker(){

	if [ ${YUM_UPDATE} -eq 1 ] ; then
		yum -y update
	fi

	yum install -y yum-utils device-mapper-persistent-data lvm2 wget
	yum-config-manager --add-repo https://download.docker.com/linux/centos/docker-ce.repo
	yum install -y  docker-ce docker-ce-cli containerd.io
}

prerequisites
install_docker
Configuring Docker
#!/bin/bash

function prerequisites(){
	if [ "$(id -u)" != "0" ]; then
		echo "This script must be run as root"
	fi

	[[ -z ${DOCKER_USER} ]] && { echo "DOCKER_USER is not set or empty"; exit 1; }
}

function configure_docker(){

	# Adding Docker user to docker group
	usermod -aG docker ${DOCKER_USER}

	# Creating docker directories
	mkdir -p /etc/docker /etc/containers

	tee /etc/containers/registries.conf<<EOF
[registries.insecure]
registries = ['172.30.0.0/16']
EOF

	tee /etc/docker/daemon.json<<EOF
{
   "insecure-registries": [
     "172.30.0.0/16"
   ]
}
EOF

	# Reloading and restarting Docker daemon
	systemctl daemon-reload
	systemctl restart docker

	# Enabling Docker to start at boot
	systemctl enable docker
}

prerequisites
configure_docker
Configuring firewall and network
#!/bin/bash

function prerequisites(){
	if [ "$(id -u)" != "0" ]; then
		echo "This script must be run as root"
		exit 1
	fi
}

function configure_firewall_and_network(){
	# Enabling port forwarding
	tee -a /etc/sysctl.conf<<EOF
net.ipv4.ip_forward = 1
EOF
	sysctl -p

	# Configuring Firewalld
	DOCKER_BRIDGE=$(docker network inspect -f "{{range .IPAM.Config }}{{ .Subnet }}{{end}}" bridge)
	# Firewalld for dockerc zone (internal access)
	firewall-cmd --get-active-zones | grep dockerc 2>&1 1>/dev/null
	if [ $? -ne 0 ] ; then
		firewall-cmd --permanent --new-zone dockerc
		firewall-cmd --permanent --zone dockerc --add-source ${DOCKER_BRIDGE}
		firewall-cmd --permanent --zone dockerc --add-port={80,443,8443}/tcp
		firewall-cmd --permanent --zone dockerc --add-port={53,8053}/udp
		# Firewalld for public zone (external access)
		firewall-cmd --permanent --zone public --add-port={80,443,8443}/tcp
		firewall-cmd --reload
	fi
}

prerequisites
configure_firewall_and_network
Installing OpenShift
#!/bin/bash

function prerequisites(){
	if [ "$(id -u)" != "0" ]; then
		echo "This script must be run as root"
		exit 1
	fi
}

function install_openshift(){
	if [ "$(id -u)" != "0" ]; then
		echo "This script must be run as root"
	fi

	if [ ! -z ${OPENSHIFT_LOCAL_ARCHIVE} ] ; then
		OPENSHIFT_ARCHIVE_NAME=$(basename ${OPENSHIFT_LOCAL_ARCHIVE})
		if [ ! -f "${OPENSHIFT_ARCHIVE_NAME}" ] ; then
			if [ ! -f "${OPENSHIFT_LOCAL_ARCHIVE}" ] ; then
				wget -O ${OPENSHIFT_ARCHIVE_NAME} ${OPENSHIFT_GITHUB_ARCHIVE}
			else
				cp -f ${OPENSHIFT_LOCAL_ARCHIVE} ${OPENSHIFT_ARCHIVE_NAME}
			fi
		fi

		tar xvf ${OPENSHIFT_ARCHIVE_NAME}
		cd openshift-origin-client*/
		mv oc kubectl /usr/local/bin/
	else
		yum -y install centos-release-openshift-origin
		yum -y install origin-clients
	fi
}

prerequisites
install_openshift
Configuring OpenShift
This script must be executed as non-root user. Because I ran this script many times, my download speed from docker was really slow. I saved the OpenShift docker images locally (using docker save myimage:latest | gzip > myimage_latest.tar.gz for each OpenShift required image) and, when installing the virtual machine again, I directly loaded OpenShift images to my local docker instance (using docker load -i myimage_latest.tar.gz).
#!/bin/bash

function prerequisites(){
	cd ~

	oc version 2>&1 1>/dev/null
	if [ $? -ne 0 ] ; then
		echo "OpenShift is not installed... Exiting"
		exit 1
	fi

	[[ -z ${ETH_INTERFACE_NAME} ]] && { echo "ETH_INTERFACE_NAME is not set or empty"; exit 1; }

	export ETH_INTERFACE_IP=$(ip -4 addr show ${ETH_INTERFACE_NAME} | grep -Po 'inet \K[\d.]+')
}

function configure_openshift(){

	# Installing Docker images from tar.gz archives
	if [ -d ${OPENSHIFT_DOCKER_ARCHIVES} ] ; then

		# Loading OpenShift images to Docker
		find ${OPENSHIFT_DOCKER_ARCHIVES} -type f -name "openshift_origin*.tar.gz" -exec docker load -i  {} \;
	fi

	# Starting OpenShift Origin local cluster
	oc cluster up --public-hostname=${ETH_INTERFACE_IP} --routing-suffix=${ETH_INTERFACE_IP}.xip.io
}

prerequisites
configure_openshift
Accessing the console
After the “oc cluster up” command, the console output should indicate how to connect to the OKD console.

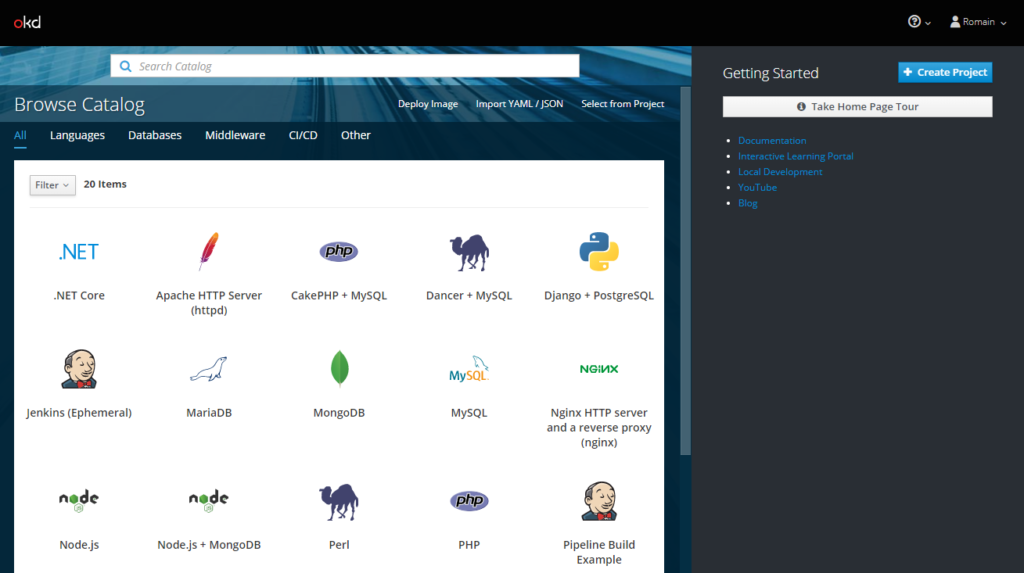
When connecting to https://192.168.99.111:8443/console using my web browser, the console is displayed, allowing me to enter my credentials.

Let’s try to connect with “Romain” as username and “mysecretpassword” as password.

YES ! I’m able to connect to my OpenShift platform with my new credentials. To be sure that all is working fine, create a new project and try to deploy an app (I tried with “Apache HTTP Server”). After some network configuration to resolve the httpd route, httpd home page is displayed.

